The easiest and best way to make butternut squash soup

Edit:  pictures now present, long-winded narrative remains.

Fall approaches, and the warm and cozy caramel flavors of fall food are already starting to tempt our taste buds.  Well, I like them all year ’round, but I also sing Christmas songs all year round, so I’m always in a state of seasonal dysfunction.

In any case, I’ve had people ask about my method of dealing with butternut-squash soup.  It’s such an enjoyable soup, but it’s also a lot of work.  I decided after I acquired a butternut squash last winter that I had no interest in peeling the large, hard fruit, then cutting it up and boiling it, all the while fussing with onions, garlic, spices, and the whole motley crew of necessary flavor supports.  I then realized that roasting would enhance the delicious flavor of the squash far more than boiling would, and would be much easier and more hands-off than cutting the whole thing up.  So I started looking for recipes, and liked what I saw.  I went off to work thinking happily about the soup I would make.

But before I arrived home I realized something even more wonderful:  why did only the squash have to be roasted?  Why couldn’t I throw the onion and garlic in there as well?  This would reduce the labor significantly, and again, because roasting would bring out a dark, earthy, caramelized flavor in the other vegetables as well, it would be especially wonderful.

Reader, it was true.  Sometimes easier is better.  It is so with Easy Mac and it is so with this.  The same warning goes with this as goes with most of my recipes:  I cook iteratively and intuitively, so the spice and liquid amounts are mere estimates.  Be conservative with each at first, and add more if you need to.

ALL ROASTED EVERYTHING BUTTERNUT SQUASH SOUP (can be made vegan!)

(Makes four-ish good-sized servings?  Maybe more?  I don’t know, I eat a lot)

Section 1, the ingredients that get roasted

  • 1 large or 2 to 3 adorably small butternut squash
  • 1 onion, size dependent on how much you love onion
  • 2 or 3 cloves of garlic (peeled)
  • Salt, pepper, and neutral oil such as canola oil

Section 2, the other stuff

  • 1 tablespoon butter or oil
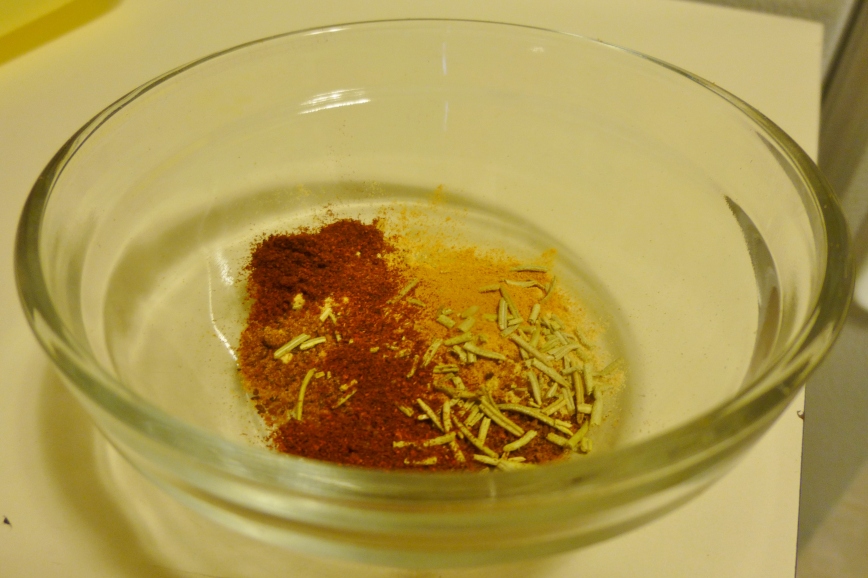
  • Spices:  start with a good pinch each of paprika, turmeric, ginger, nutmeg, dried rosemary, sage (if you like), and pepper, and keep them handy to add more later.  Shoot, throw in some cumin too, if you want.  Don’t be afraid of the nutmeg, though–it really enhances the creaminess of the soup in a wonderful way
  • 2.5-3 cups of chicken or vegetable broth, or other not overly assertive broth–low sodium if possible
  • Water as needed (see procedures)
  • About 1/3 cup cream, evaporated milk, or coconut milk (start with this and add more if you think it’s needed)

Procedure

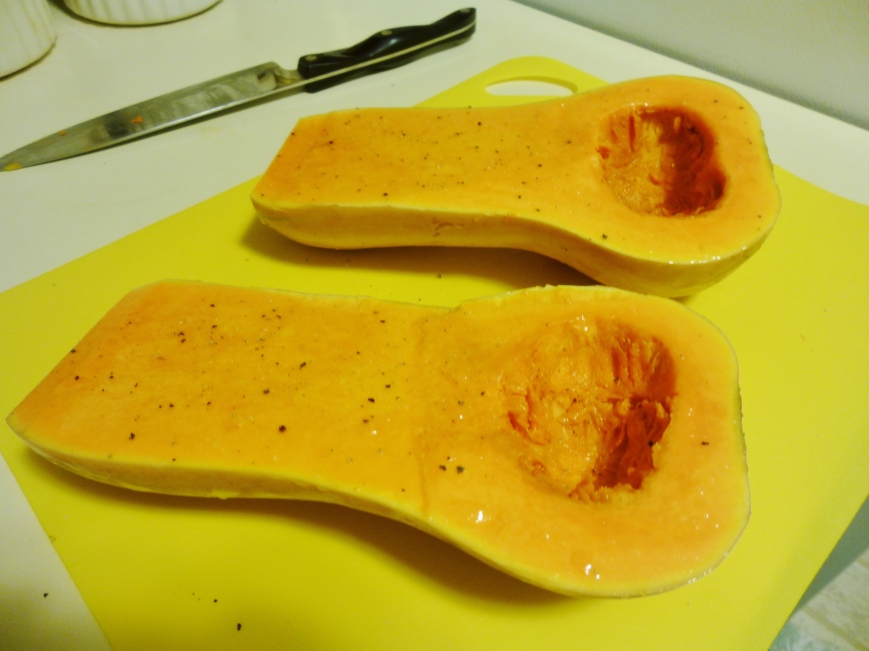
Turn your oven to 400 degrees F.  While it heats, rinse off your squash, cut off its stem, and slice it lengthwise.  Scoop out the seeds and fibers (though you don’t have to be obsessive about the fibers, since it’s going to be blended anyway).  If you want, reserve the seeds and toast them, using them as a garnish.  Rub the tops with oil and sprinkle reasonably generously with salt and pepper.  My squash this last time was a little underripe, leading to a sort of starchy, fibrous soup.  Be sure to get a ripe squash, don’t do as I did.

P1020639

Put on a cookie sheet, jelly roll pan, or other such large, flat pan, and pop it into the oven.

20 minutes after the squash starts cooking, peel and cut your onion.  If it’s small, cut it into fourths; if large, into eighths; if somewhere in between, use your mathematical judgment.  It’s not really that big of a deal.  Toss the onion and garlic with some more oil (enough to coat them lightly) and sprinkle some salt and pepper on them too.  Open your oven door and just put them in the same pan as the squash.  Give them a stir in about 20 minutes.

At any point in the next 40 minutes after you’ve put the onions and garlic in (so you can see, the total cooking time for the squash is one hour, or until fork tender; the onions and garlic should, by this time, be soft everywhere and dark brown in spots but not, you know, burned), get a deep pot and put it on the stove.  Turn the heat to medium.  Put the butter in, and when it’s melted and starting to foam, put in your spice mélange.

P1020644

This is called “blooming” the spices and it’s very common in Indian cooking.  The spices will have a far more delightful and intense flavor than if you just threw them into wet soup.  You can definitely add more to the completed soup to correct the spice level, but starting with at least a perceptible base will really help.  Anyway, bloom them for about a minute, then pour in your broth.  Give it a stir and turn the heat down to medium low if the vegetables are ready, or very low (plus cover your pot) if you still have to wait awhile.

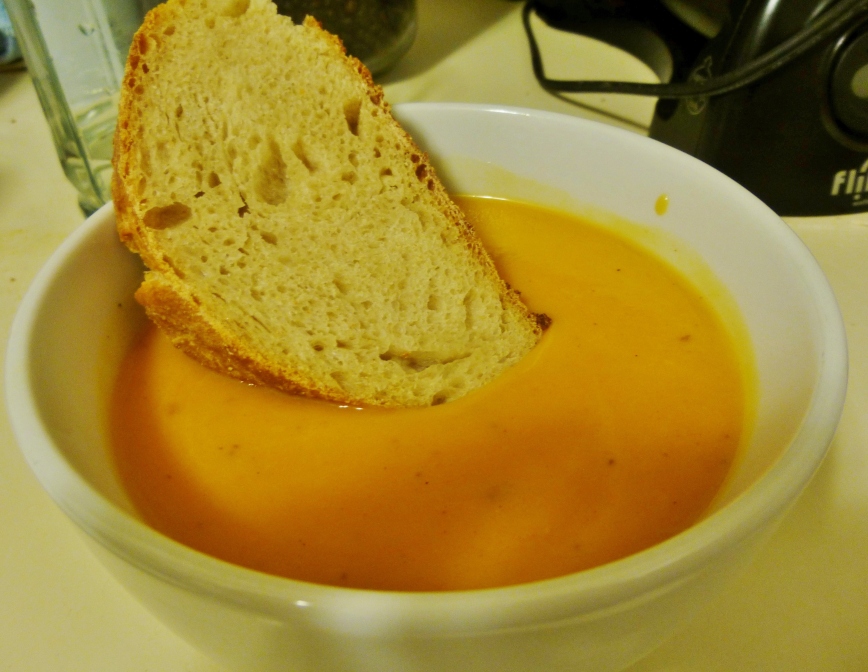
Now get your roasted vegetables out.  Scoop the squash out of its skin and dump it into the pot, along with the delicious roasted onions and garlic.  Be sure to have turned the heat back up to medium low if you had it on low.  Stir all this and let it incorporate for a minute, give it a taste, and adjust as needed.  Now (carefully!) transfer to a blender and blend on a low setting (too high and it will get thin and watery) until it’s homogeneous, removing the pot from the burner but keeping the heat on.  Transfer back to the pot and put it back on the burner, taste and adjust seasoning again, and add water if it’s too thick for your liking.  Finally, stir in your cream and serve!  You will love it, I assure you.  Please remember to turn the burner and oven off once you’re finished, though.  Only you can prevent house fires.

While you’re at it, why not serve with some home-made whole grain sourdough bread?  That wouldn’t hurt, right?  (Pay no attention to the dirty counter.  It’s a figment of your imagination.)
P1020646

The best (and only?) sourdough cornmeal waffle recipe ever

Dear reader,

Do you wish for a breakfast dish that is cheap and easy to prepare, makes your kitchen smell like Heaven’s own galley, and will make your guests’ jaws drop when they see it?  Then you are in luck!  Below, I give you my greatest culinary discovery to date.

As a bit of background, I’ve been making sourdough buckwheat waffles for a few years now, because they far surpass standard non-yeasty waffles in every way.  They have such a delicate, lacy, ethereal crispness on the outside, and an incredibly light yet moist interior, with a complex, nutty flavor throughout.  My mother describes them as “crispy air”.

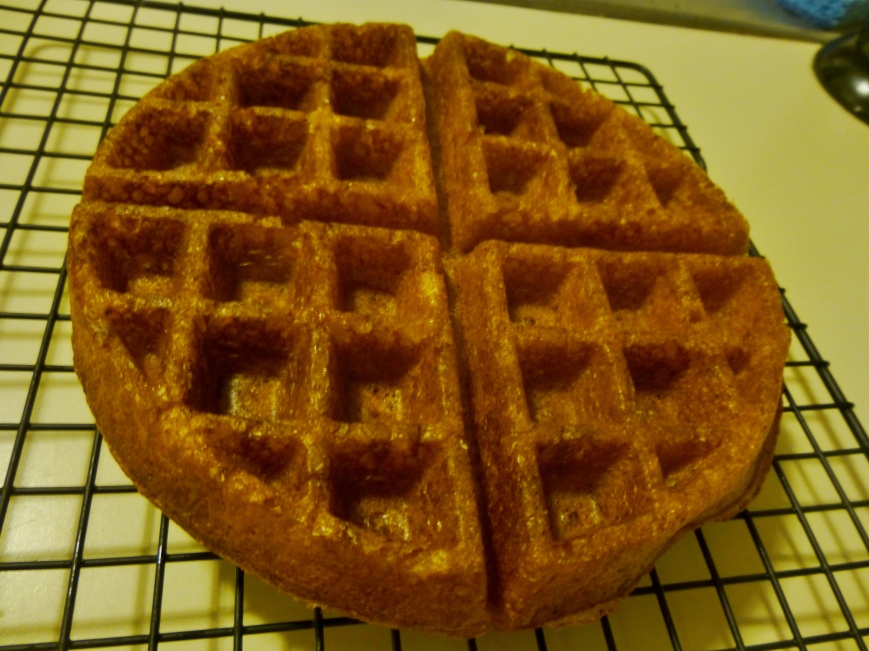
Last night, I thought about how much I wanted some for breakfast this morning, but going out and getting buckwheat flour at the dreadful hour of 9 p.m. or something?  No way.  But I did happen to have some cornmeal, which I get from time to time in vain attempts to replicate my mother’s cornbread.  So I thought, okay, I’ll give that a shot.  Behold the (slightly blurry) result:

cornwaffle

WOW.  I mean WOW.  Reader, I nearly wept.  The overnight sponge process made the cornmeal more tender and better hydrated than a standard cornbread or other quickbread preparation would have been, but it still had a wonderfully pleasing cragginess, and all the eggy, delicate, tender scrumptiousness of the interior was there from the buckwheat version.  Indeed, it was even better.  Cornmeal, as you no doubt know, has more sugar than buckwheat flour, so it caramelized even more handsomely and had a slightly roasty flavor.  And I find, perhaps because I grew up with buttermilk cornbread, I find that cornmeal has a particular affinity for tangy flavor profiles, which of course comes with the sourdough treatment.

Plus of course, it had that guileless, sunny corn quality that makes my peasant heart sing.

If you do have buckwheat flour and want to try that, just use buckwheat flour instead of the cornmeal and add a pinch of ginger.  You can do everything else the same, and you’ll end up with extreme deliciousness either way.  The corn-based batter tends to be a little thinner, but they both perform well.

Makes about three large Belgian waffles

  • 1/3 cup starter, straight from the fridge is ok
  • 2/3 cup all purpose flour
  • 2/3 cup cornmeal (medium grind, not corn flour)
  • 1 1/3 cup water

  • 1 to 2 Tbsp brown sugar, honey, etc. (not white sugar, it’s too bland)
  • 1 to 2 Tbsp neutral oil, such as canola oil
  • 1 large egg
  • Scant 1/2 tsp salt
  • Tbsp hot water
  • 3/4 tsp baking soda

___
Stir together first four ingredients in a large bowl, cover lightly (like with a plate), and let set out overnight (6 to 10 hrs). It should puff up a little and smell yeasty.

Next morning, whisk together the next four ingredients in a small bowl, then lightly whisk them into the starter mixture. Turn on the waffle iron. Dissolve the baking soda in the hot water and fold it in to the batter. It should froth a bit, making it even lighter. Then, the waffles to your liking and eat right away, or at least right after you add some butter and syrup–much like the pentaquark, their crispness is too special and rare to last very long.  On my waffle maker, they take about 4.5 minutes to cook and use a scant cup of batter per waffle.  If you can’t eat them immediately, you can recrisp them in a toaster oven, and it will still be nice, but not quite as wondrous.

Let me know if you make them, and what you think of them!

P.S.  I know it’s been ages since I’ve written anything.  Thank you Andy Wright for pressuring me to get back in gear.

Scrumptrulescent scallion pancakes

This semi-week’s word is an unusual choice; it’s a recent neologism to be found mostly on urbandictionary.  It’s a word of passion; its tinge of Latinate classiness adds to the splendor it tries to express.

And I think it expresses well the deliciousness of scallion pancakes.  If you’ve never had them, they’re thin, crispy, and multilayered, with tender morsels of scallion, the unctuous richness of sesame oil, and accompanied by a perky dipping sauce.  They are definitely worth making a couple of times (I didn’t do them too well the first time; but have some patience).  They’re really quite easy for their level of excellence.

I use this recipe, but I usually use part whole wheat flour.  It improves the texture and adds an additional dimension of nuttiness.  Scrumptrulescent!

Mom’s fried chicken and Grandma’s biscuits: all the fat you’ll ever need

One lesson we can learn from the great writers of haiku is that simplicity can be beautiful.  I’d offer the following as a gustatory example of that principle.  These biscuits (which my grandmother taught me how to make when I was but a babe) and this chicken (which my mother sort-of explained to me and which I made good through trial and error) really are splendid, and they are very simple.  Everyone who tries my mom’s chicken says it’s the best they’ve ever had, and mine isn’t quite as good, but it’s getting there.  It’s all in the small details of technique, especially with the biscuits; you must learn to speak the language of the biscuit, which is a perceptive but very light touch.  A unifying theme here is buttermilk, without which the South would fall (again?).

I would show you pictures, but the evidence has been destroyed.

Mom’s magnificent fried chicken

  • Boneless, skinless chicken breasts (thawed, if purchased frozen)
  • Buttermilk (enough to cover the cut-up breasts in a bowl)
  • Hot sauce (a few drops; optional)
  • Flour mixture (per large breast:  1 cup all-purpose flour; 2 teaspoons seasoned salt; 1/4 ground black pepper, 1/4 teaspoon paprika.  This is very loosey-goosey; start with these proportions, taste, and adjust to your preference.  You can always add either more seasoning or more flour, so be bold!)
  • Your preferred deep frying oil (just use vegetable if you’re unsure) and a good pan that can hold its temperature well (a deep cast-iron skillet is always preferred)
  • Time (between 2 and 24 hours)

Cut any obvious cartilage off the chicken.  Slice the meat (being careful not to cut with the grain!) into nugget-sized pieces.  They can vary somewhat, but we want smallish pieces that will cook quickly and absorb lots of the tenderizing buttermilk.

Put the sliced chicken into a bowl and just cover with buttermilk.  Add the hot sauce, if you like.  Stir everything together, cover, and refrigerate for between 2 and 24 hours.

Take the chicken out.  Pour oil into your skillet to a depth of at least half an inch (oh, don’t complain; after a certain point more oil does not mean more fat in your food) and turn the heat to medium-high.  While it’s heating, put your flour mixture ingredients into a large bag (an empty cereal bag or gallon zip-locking back should do) and shake them to combine.  Taste and adjust as necessary.

With a fork or tongs, remove several pieces of chicken from the buttermilk, shaking gently to remove excess.  Close up the bag and give it a good shaking.  You want a nice even coating.

Once the oil is shimmering–that is, there’s some obvious surface motion and perturbation lower down, but it’s still not popping or crackling–test the oil by dropping in a piece of chicken.  If it sinks to the bottom and doesn’t sizzle merrily, it’s not hot enough yet.  Wait until it rises, then try another.  Once you get a moderate sizzle as soon as you drop it in, you can start putting in the rest.  If it starts smoking or hissing extremely loud as soon as you put it in, you may need to reduce the temperature.  Do NOT fill the whole pan.  Just calm down and do it in several batches.  This keeps the oil hot and gives you room to maneuver.

Remove the chicken from the oil with a slotted spoon or something of the like and put it on a wire rack or plate with paper towels.  If you’re me, you’ll eat it while it’s still crispy and mouth-searingly hot.  Quite nice with honey, actually.

__________________________________________________________________

Grandma’s Meltingly Delicious Buttermilk Biscuits

(makes 4 fairly large biscuits; easily multiplied by 1.5, 2, or any multiple thereof)

  • 1 cup unbleached all-purpose flour (if using self-rising, omit the salt and baking powder) [recommendation: White Lily, if you can get it]
  • 1/4 tsp salt, 1 barely heaping tsp baking powder
  • 1/2 tsp sugar
  • 3 to 4 tbsp shortening, chilled if possible
  • Buttermilk (I can never figure out the quantity, sorry–but let’s say at least 1/3 cup)
  • A little extra flour in a small bowl
  • A little extra shortening to grease the pan (which will, of course, be another cast-iron skillet)
  • Butter to adorn the biscuits before they go into the oven

Turn the oven to 450 degrees Fahrenheit.  If you want a wetter drop biscuit, which will be thinner and crispier, turn it to 475 instead.

Sift the dry ingredients into a bowl.  I like to give them an additional quick whisk with a fork to incorporate them.  Rub the [extra] shortening around the inside of your pan.

Drop the [3 to 4 tablespoons] shortening by tablespoons into the bowl.  Cut it in with a fork until it looks like coarse crumbs and chunks that are about the size of lentils or small pebbles.

Scoop the mixture such that there’s an indentation in the bowl.  Let’s say that the bottom of it should almost touch the bottom of the bowl, and it should be about half the volume of the dry ingredients.

Get your jug of buttermilk [if you’re in a pinch:  I find that milk mixed with a little sour cream provides different but very pleasant results] and give it a good shake so that the buttermilk is frothy.  This will help make your biscuits gloriously light and tender.  Pour the buttermilk in until it fills the indentation.

THIS IS THE MOST IMPORTANT PART!!!!

Carefully whisk the buttermilk into the mixture, almost with a folding motion, with just a few strokes.  It should look kind of jagged; mixed together but not smooth.  I find it takes me between 5 and 10 strokes.  It’s MUCH better to under-mix than over-mix.  Just make sure there’s not much dry shortening-flour mixture clinging to the bottom of the bowl.  Now, take the fork and scoop up a handful of dough.  Drop it into the little bowl of flour and as gently as possible, roll the biscuit in the flour with your hands.  Try to keep it on the palm of one hand while you round it with the other.  Use the texture to tell you how it’s going.  The biscuit should feel light for its volume, pleasantly plump, lumpy.  Do not mash it, do not knead it.  You do not want to over-work the gluten!  This is a delicate biscuit, not bread.  Just shape it until its surface is uniformly coated.  Then drop it into the pan.  Repeat until the dough is gone, making sure the biscuits are smooshed together on the pan (this will force them to rise higher).  You can also gently press them to a uniform height.  I do it, though I’m not sure why.

Now drop a tiny (~1/4 tsp) pat of butter on top of each biscuit.  Pop the pan in the oven and cook between 15 and 20 minutes, or until they’re decidedly golden brown.

__________________________________________________________________

A note about serving these two things together:

I’d suggest, if you’re planning to cook these two things for the same meal, to turn on the oil for the chicken as soon as you put the biscuits in the oven.  You should be mostly finished with at least one breast by the time the biscuits are done.  Then you can have baller chicken biscuits of your very own!